
I have been using Weblate since version 3, but previously I used Weblate hosting.
A new challenge is to install the current version (version 51) on our own server. We’ll choose a variant installation for Linux Debian/Ubuntu2.
Let’s start the installation 😂
Linux + Redis + Postfix #
I will host Weblate using a new weblate user, in the same group as the Nginx webserver, which is www-data. I also want the user to be able to sudo and manually set the password afterward.
$ sudo adduser --home /home/weblate --shell /bin/bash --ingroup www-data --gecos "" --disabled-password weblate
Adding user `weblate' ...
Adding new user `weblate' (1000) with group `www-data' ...
Creating home directory `/home/weblate' ...
Copying files from `/etc/skel' ...
$ sudo usermod -a -G sudo weblate
$ sudo passwd weblate
System requirements as declared on2:
$ sudo apt install -y \
   libxml2-dev libxslt-dev libfreetype6-dev libjpeg-dev libz-dev libyaml-dev \
   libffi-dev libcairo-dev gir1.2-pango-1.0 libgirepository1.0-dev \
   libacl1-dev libssl-dev libpq-dev libjpeg-dev build-essential \
   python3-gdbm python3-dev python3-pip python3-virtualenv virtualenv git

# Caching backend: Redis
$ sudo apt install -y redis-server

# SMTP server
$ sudo apt install -y postfix
PostgreSQL #
We’ll use PostgreSQL as the database server and Redis as the cache server. Refer to the installation documentation3.
# Database server: PostgreSQL
$ sudo apt install -y postgresql postgresql-contrib
Next, set up the database system.
# If PostgreSQL was not installed before, set the main password
$ sudo -u postgres psql postgres -c "\password postgres"

# Create a database user called "weblate"
$ sudo -u postgres createuser --superuser --pwprompt weblate

# Create the database "weblate" owned by "weblate"
$ sudo -u postgres createdb -E UTF8 -O weblate weblate
I don’t want the Weblate user to be a superuser in PostgreSQL.
# Create a database user called "weblate" without superuser
$ sudo -u postgres createuser --pwprompt weblate

# Create the database "weblate" owned by "weblate"
$ sudo -u postgres createdb -E UTF8 -O weblate weblate

# Login to PostgreSQL psql and install modules
$ sudo -u postgres psql postgres
psql# CREATE EXTENSION IF NOT EXISTS pg_trgm;
psql# CREATE EXTENSION IF NOT EXISTS btree_gin;
PostgreSQL is configured. After installation, Weblate will configure PostgreSQL in its settings.
Install Weblate using pip
#
# Install virtual environment at /home/weblate/weblate-env
$ virtualenv ~/weblate-env

# Activate virtual environment
$ source ~/weblate-env/bin/activate

# Install Weblate with PostgreSQL optional dependencies
$ pip install "Weblate[Postgres]"

# Or if you need to install Weblate with all optional dependencies
# pip install "Weblate[all]"
A list of available optional dependencies is in the documentation4.
I use pip install "Weblate[Postgres]" because we will use a PostgreSQL database. Note that it is [Postgres] and not [PostgreSQL].
Configure the Weblate.
-
Copy the file
~/weblate-env/lib/python3.10/site-packages/weblate/settings_example.pyto~/weblate-env/lib/python3.10/site-packages/weblate/settings.py. Thepython3.10version depends on your system version. -
Adjust values in the newly copied
settings.py. My adjustments include:
SITE_DOMAIN = "webl.oo.or.id"ADMINS: tuple[tuple[str, str], ...] = ( ("oon", "[email protected]"), )DATA_DIR = "/home/weblate/data"CACHE_DIR = f"{DATA_DIR}/cache"SECRET_KEY = "generate it using weblate-generate-secret-key"SERVER_EMAIL = "[email protected]"DEFAULT_FROM_EMAIL = "[email protected]"DATABASES = { "default": { "ENGINE": "django.db.backends.postgresql", "NAME": "weblate", "USER": "weblate", "PASSWORD": "insecure~pasSw0rd", "HOST": "127.0.0.1", "PORT": "", "OPTIONS": {}, "CONN_MAX_AGE": None, "CONN_HEALTH_CHECKS": True, "DISABLE_SERVER_SIDE_CURSORS": False, } }
- Create DATA_DIR5.
mkdir /home/weblate/data- Ensure the directory is owned by the user
weblateand the groupwww-data, with permissiondrwxr-xr-x, which is sufficient for the userweblateto write data to the directory. However, since it is under/home/weblatewith permissiondrwxr-x---, other groups (besideswww-data) will be unable to access this directory.
-
Initialize the Weblate database structure with (Django)
migrate, in Weblate it’s calledweblate migrate. -
Create an administrator user account
adminand generate its password. Make sure to copy and save it for later use:weblate createadmin. Useweblate createadmin --updateto reset a lost admin password. -
Collect static files for the web server with (Django)
collectstatic, which in Weblate it’s calledweblate collectstatic. Hundreds of static files will be copied to'/home/weblate/data/cache/static'. -
Compress the JavaScript and CSS files (assets) with
weblate compress. Initially, you may getCommandError: Compressor is disabled., but you can changeCOMPRESS_OFFLINE = Truein thesettings.pyor runweblate compress --force. -
Optionally, start the Celery workers. This is not necessary for development purposes but is strongly recommended for production:
~/weblate-env/lib/python3.10/site-packages/weblate/examples/celery start. -
Start the development server with (Django) runserver, which in Weblate it’s called
weblate runserver.
- Now your development server is running on
http://localhost:8000! (Press Ctrl+C to stop the development server).
- Use
weblate check --deployto review potential issues with the installations, or access it viahttp://localhost:8000/manage/performance/.
- Regarding the issue
No module named 'google' in WEBLATE_MACHINERY, you can install thegoogle-cloud-translatemodule usingpip.
Gunicorn #
I chose Gunicorn as the WSGI server instead of uWSGI, as defined in the documentation2.
(weblate-env) $ pip install gunicorn
To test the functionality of Gunicorn, you can set it to listen on all network interfaces on port 8000 using the command gunicorn --bind 0.0.0.0:8000 weblate.wsgi. This will run the Django project weblate, which includes wsgi.py inside the directory. Refer to the Gunicorn manual 6 for details. You can access the site via a browser at http://webl.oo.or.id:8000 to see your Weblate rendered without static access. This is only a test to ensure the Django project is rendered via WSGI on the Gunicorn server. Press Ctrl+C to stop and then proceed.
Next, we’ll prepare Gunicorn for production. Using a Unix socket will be faster than a TCP socket. We want to run Gunicorn with the same user and group as Nginx to minimize permission issues. You can test this using the following command, which includes the full path to Gunicorn and uses sudo to switch the user and group to www-data.
$ sudo /home/weblate/weblate-env/bin/gunicorn --user=www-data --group=www-data --bind=unix:/run/gunicorn.sock --log-file=- --access-logfile=- --error-logfile=- weblate.wsgi:application
The last argument, weblate.wsgi:application, comes from the wsgi.py file inside the weblate package in your Weblate environment. For example, it might be located at /home/weblate/weblate-env/lib/python3.10/site-packages/weblate/wsgi.py. Check inside the file; the application after the colon comes from application = get_wsgi_application().
Stop Gunicorn by pressing Ctrl+C, and we will use systemd to keep Gunicorn running.
systemd #
As mentioned in Gunicorn’s deployment documentation 7, we will use a systemd service unit 8 and socket unit 9.
systemd.service (service unit configuration): a unit configuration file whose name ends in “.service” encodes information about a process controlled and supervised by systemd.
systemd.socket (socket unit configuration): a unit configuration file whose name ends in “.socket” encodes information about an IPC or network socket or a file system FIFO controlled and supervised by systemd, for socket-based activation.
We’ll create the gunicorn.service configuration, which requires the gunicorn.socket configuration.
First, create /etc/systemd/system/gunicorn.socket. Just as in the command line example before, the binding will be used as ListenStream=/run/gunicorn.sock and the ownership should be the same as the Nginx user www-data:
[Unit]
Description=gunicorn socket

[Socket]
ListenStream=/run/gunicorn.sock
# Our service won't need permissions for the socket, since it
# inherits the file descriptor by socket activation
# only the nginx daemon will need access to the socket
SocketUser=www-data
# Optionally restrict the socket permissions even more.
# SocketMode=600

[Install]
WantedBy=sockets.target
Next, create /etc/systemd/system/gunicorn.service, giving access to Nginx via the same group www-data, and use 3 workers as recommended in the documentation (2 * #cores) + 1:
[Unit]
Description=gunicorn daemon
Requires=gunicorn.socket
After=network.target

[Service]
Type=notify
# the specific user that our service will run as
User=weblate
Group=www-data
# another option for an even more restricted service is
# DynamicUser=yes
# see http://0pointer.net/blog/dynamic-users-with-systemd.html
RuntimeDirectory=gunicorn
WorkingDirectory=/home/weblate
ExecStart=/home/weblate/weblate-env/bin/gunicorn \
          --access-logfile - \
          --workers 3 \
          --bind unix:/run/gunicorn.sock \
          weblate.wsgi:application
ExecReload=/bin/kill -s HUP $MAINPID
KillMode=mixed
TimeoutStopSec=5
PrivateTmp=true

[Install]
WantedBy=multi-user.target
Then proceed with systemd to start and enable the gunicorn.socket:
$ sudo systemctl start gunicorn.socket
$ sudo systemctl enable gunicorn.socket
To check the status and fix any problems, use:
$ sudo systemctl status gunicorn.socket
$ sudo journalctl -u gunicorn.socket
We could start and enable the Gunicorn service using the same steps, but we will try another way.
Currently, the gunicorn.socket is already active, but the gunicorn.service is not yet active because the socket has not started receiving requests.
We can check the status of the Gunicorn service using (optionally mentioning .service):
$ sudo systemctl status gunicorn
Test the socket activation mechanism by sending a connection to the socket using curl:
curl --unix-socket /run/gunicorn.sock localhost
After the socket receives a request, the service will automatically activate. Let’s check the status again:
$ sudo systemctl status gunicorn | grep -i active
Active: active (running) since ...
To fix any issues, use journalctl:
$ sudo journalctl -u gunicorn
If you change the service file, you need to reload it with daemon-reload before you restart the service:
$ sudo systemctl daemon-reload
$ sudo systemctl restart gunicorn
Nginx #
Install the Nginx web server:
# Web server option 1: NGINX
$ sudo apt install -y nginx
Next, create a configuration file for our host. Since we are using webl.oo.or.id for the domain, create a configuration file at /etc/nginx/sites-available/webl.oo.or.id.conf. To activate the configuration, create a symbolic link from that file to /etc/nginx/sites-enabled/webl.oo.or.id.conf, as sites-enabled/*.conf is referenced in the Nginx configuration.
File webl.oo.or.id.conf:
server {
    listen 80;
    server_name webl.oo.or.id;

    location = /favicon.ico { access_log off; log_not_found off; }
    location /static/ {
        root /home/o/py/weblate/data/cache;
    }

    location / {
        include proxy_params;
        proxy_pass http://unix:/run/gunicorn.sock;
    }
}
Then restart or reload the Nginx service to activate the configuration: sudo systemctl restart nginx.
Now, try to access the website through the registered server_name in Nginx:
$ curl http://webl.oo.or.id
Alternatively, access it via a browser and log in with your registered admin account.
If you receive an HTTP 403 error while accessing your assets, make sure you give permission to the www-data group. One simple way is to set the directory structure from the home directory to be owned by the www-data group using chgrp, e.g., chgrp -R www-data /home/weblate/. Please make sure to evaluate the permissions carefully, as this will expose your files to all members of the www-data group. Since Nginx and Gunicorn run with the same group, all web applications hosted on the same server will have access to your files.
Certbot #
Next, upgrade from HTTP to HTTPS with an SSL certificate from Let’s Encrypt using certbot10. Depending on your current configuration, the easiest way is to use the Nginx plugin with certbot --nginx. However, if your server cannot be reached from the Internet (for example, if it has a local IP address under Network Address Translation or NAT), you may want to use the DNS challenge with --preferred-challenges=dns, as you will need to provide a TXT DNS entry to validate your certificate.
For this example, let’s try manual authentication with -a manual (avoid using -a manual unless necessary, as it does not support auto-renewal) and the Nginx installer with -i nginx.
$ sudo apt install certbot python3-certbot-nginx
$ sudo certbot -a manual -i nginx --preferred-challenges=dns -d webl.oo.or.id
If successful, the result will be:
...
Deploying certificate
Successfully deployed certificate for webl.oo.or.id to /etc/nginx/sites-enabled/webl.oo.or.id.conf
Congratulations! You have successfully enabled HTTPS on https://webl.oo.or.id
This will change the configuration to:
server {
    server_name webl.oo.or.id;

    location = /favicon.ico { access_log off; log_not_found off; }
    location /static/ {
        root /home/o/py/weblate/data/cache;
    }

    location / {
        include proxy_params;
        proxy_pass http://unix:/run/gunicorn.sock;
    }

    listen 443 ssl; # managed by Certbot
    ssl_certificate /etc/letsencrypt/live/webl.oo.or.id/fullchain.pem; # managed by Certbot
    ssl_certificate_key /etc/letsencrypt/live/webl.oo.or.id/privkey.pem; # managed by Certbot
    include /etc/letsencrypt/options-ssl-nginx.conf; # managed by Certbot
    ssl_dhparam /etc/letsencrypt/ssl-dhparams.pem; # managed by Certbot

}
server {
    if ($host = webl.oo.or.id) {
        return 301 https://$host$request_uri;
    } # managed by Certbot


    listen 80;
    server_name webl.oo.or.id;
    return 404; # managed by Certbot


}
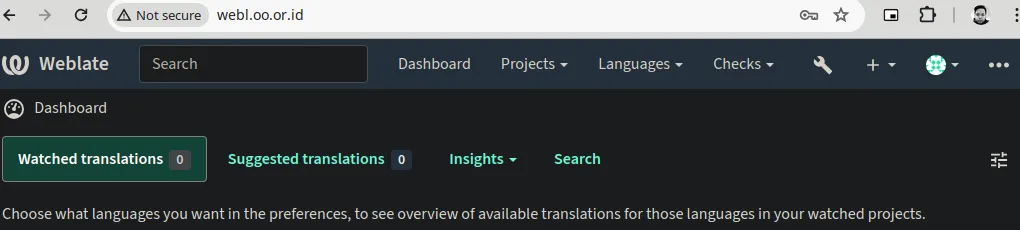
And it’s done. Time to start the translations!
-
https://docs.weblate.org/en/weblate-5.0/admin/install/venv-debian.html ↩︎ ↩︎ ↩︎
-
https://docs.weblate.org/en/weblate-5.0/admin/install.html#postgresql ↩︎
-
https://docs.weblate.org/en/weblate-5.0/admin/install.html#optional-deps ↩︎
-
https://docs.weblate.org/en/latest/admin/config.html#data-dir ↩︎
-
https://www.freedesktop.org/software/systemd/man/latest/systemd.service.html ↩︎
-
https://www.freedesktop.org/software/systemd/man/latest/systemd.socket.html ↩︎
-
https://eff-certbot.readthedocs.io/en/stable/using.html#getting-certificates-and-choosing-plugins ↩︎