
It’s been years since I last checked out the open-source Moodle Learning Management System (LMS) project1, and now it’s becoming a really interesting project. Currently, it’s at Moodle 4, the long-term-support (LTS) version 4.1.
As I’m restarting my career and delving into EdTech, I’m also working on my certification course, Spring 2023-EPOL 483-Learning Technologies.
So let’s dive into Moodle a bit 😂
Okay, first step, installation… Compared to the documentation for Django, the Moodle documentation is quite minimalistic 😢
I attempted to install it on Debian (on KVM, Debian has a minimalist iso: netinst), but the community installation documentation for Debian is lacking2, so I referred to the installation documentation for Ubuntu34. I prefer to use nginx instead of Apache and PostgreSQL instead of MySQL, but the documentation for both Nginx5 and PostgreSQL6 is too concise, so I had to figure out the configuration myself.
PHP #
I’m using the requirements from 7, and the guidance for the PHP version is referred to in 8. Additionally, Moodle requires the several PHP extensions.
$ sudo apt install nginx php-fpm php-xml php-mbstring php-curl php-zip php-gd php-intl
(or you may need to specify the package specifically as php8.1-fpm, php8.1-xml, php8.1-mbstring, php8.1-curl, php8.1-gd, php8.1-zip, and php8.1-intl)
To check the modules as required in 7, the recommendations are sodium and exif:
$ php8.1 -m
To comply with the PHP setting max_input_vars in the requirements 7, edit the php.ini file. In my environment, I found it at /etc/php/8.1/fpm/php.ini.
# in file /etc/php/8.1/fpm/php.ini

; How many GET/POST/COOKIE input variables may be accepted
;max_input_vars = 1000
max_input_vars = 5000
Nginx #
After installing PHP, let’s try to display the phpinfo() via the web server, which I chose as nginx over Apache.
Install the nginx web server. By the way, it’s pronounced “engine x”.
$ sudo apt install nginx
Check if nginx is running and listening on (TCP) port 80, also known as port http, using the command ss or socket statistics.
$ ss --listen --tcp
or, if you want to be more specific about the source (src) port http:
$ ss --listen --tcp src :http
To ensure that the process listening on the http port is nginx (and not another web server such as Apache), you need to use the superuser sudo.
$ sudo ss --listen --tcp --process src :http
State              Recv-Q             Send-Q                         Local Address:Port                         Peer Address:Port            Process
LISTEN             0                  511                                  0.0.0.0:http                              0.0.0.0:*                users:(("nginx",pid=624,fd=5),("nginx",pid=623,fd=5),("nginx",pid=620,fd=5))
LISTEN             0                  511                                     [::]:http                                 [::]:*                users:(("nginx",pid=624,fd=6),("nginx",pid=623,fd=6),("nginx",pid=620,fd=6))
You can also check by opening a browser and accessing the IP Address http://192.168.122.123
$ curl http://192.168.122.123
<!DOCTYPE html>
<html>
<head>
<title>Welcome to nginx!</title>
...
If you encounter HTTP Error 500, check the default error.log. In Ubuntu, the error log is directly output there, but not in Debian (you still need to reconfigure).
$ sudo tail /var/log/nginx/error.log
Let’s find out the main directory of nginx, also known as the root directory or www root.
$ grep root /etc/nginx/sites-enabled/default
root /var/www/html;
Create a phpinfo.php file in www root.
echo "<?php phpinfo(); ?>" | sudo tee /var/www/html/phpinfo.php
We cannot directly access http://192.168.122.123/phpinfo.php as it will output the plain text contents of phpinfo.php, so we need php-fpm.
php-fpm #
We have installed php-fpm, but as we can see, there’s no socket listening with the process name php-fpm. So our guess is that php-fpm listens as a sock file.
$ grep listen /etc/php/8.1/fpm/pool.d/www.conf | grep -v "^;"
listen = /run/php/php8.1-fpm.sock
listen.owner = www-data
listen.group = www-data
Find out more details regarding the socket file /run/php/php8.1-fpm.sock:
$ sudo lsof +c0 -Ua /run/php/php8.1-fpm.sock
COMMAND      PID     USER   FD   TYPE             DEVICE SIZE/OFF  NODE NAME
php-fpm8.1 10099     root    8u  unix 0x027a7860e      0t0 26227 /run/php/php8.1-fpm.sock type=STREAM (LISTEN)
php-fpm8.1 10100 www-data   10u  unix 0x027a7860e      0t0 26227 /run/php/php8.1-fpm.sock type=STREAM (LISTEN)
Move forward, configure the php-fpm with nginx. To simplify this writing, we will use the default setting of nginx (a site without a domain, just an IP Address). Adjust the configuration in /etc/nginx/sites-enabled/default, from:
    # pass PHP scripts to FastCGI server
    #
    #location ~ \.php$ {
    #       include snippets/fastcgi-php.conf;
    #
    #       # With php-fpm (or other unix sockets):
    #       fastcgi_pass unix:/run/php/php7.4-fpm.sock;
    #       # With php-cgi (or other tcp sockets):
    #       fastcgi_pass 127.0.0.1:9000;
    #}
to this configuration (make sure to change unix:/run/php/php8.1-fpm.sock):
    location ~ \.php$ {
            include snippets/fastcgi-php.conf;
            # With php-fpm (or other unix sockets):
            fastcgi_pass unix:/run/php/php8.1-fpm.sock;
    }
Test the nginx configuration, and if it is okay, restart nginx:
$ sudo nginx -t
$ sudo systemctl restart nginx
Check the phpinfo again:
$ curl http://192.168.122.123/phpinfo.php
<!DOCTYPE html PUBLIC "-//W3C//DTD XHTML 1.0 Transitional//EN" "DTD/xhtml1-transitional.dtd">
<html xmlns="http://www.w3.org/1999/xhtml"><head>
<title>PHP 8.1.27 - phpinfo()</title><meta name="ROBOTS" content="NOINDEX,NOFOLLOW,NOARCHIVE" /></head>
...
If we install a new PHP extension or reconfigure, restart the PHP-FPM:
$ sudo apt install php8.1-soap
$ sudo systemctl restart php8.1-fpm
Our web server is ready to serve PHP files.
PostgreSQL #
Next, the database. As mentioned in the requirements 7, I use PostgreSQL 12.
$ sudo apt install postgresql-12
(Sometimes you need to provide the package locales-all before installing PostgreSQL)
Next, check if the service is listening on port 5432, also known as port postgresql:
$ sudo ss --listen --tcp --process
or you can easily connect to the database server via the postgresql client cli psql with the user postgres (to the database postgres), and then check the connection info with the command \conninfo.
$ sudo su - postgres -c psql
psql (12.18 (Debian 12.18-1.pgdg120+2))
Type "help" for help.

postgres=# \conninfo
You are connected to database "postgres" as user "postgres" via socket in "/var/run/postgresql" at port "5432".
To connect PHP to PostgreSQL, install the extension php8.1-pgsql and restart php8.1-fpm:
$ sudo apt install php8.1-pgsql
$ sudo systemctl restart php8.1-fpm
Moodle #
It’s time for the main course: installing Moodle using git.
$ git clone git://git.moodle.org/moodle.git
It received tens of thousands of files with hundreds of MB 😂
$ cd moodle
$ git branch -a | grep STABLE
...
  remotes/origin/MOODLE_400_STABLE
  remotes/origin/MOODLE_401_STABLE
$ git branch
* main
$ git branch --track MOODLE_401_STABLE origin/MOODLE_401_STABLE
$ git branch
  MOODLE_401_STABLE
* main
$ git checkout MOODLE_401_STABLE
Switched to branch 'MOODLE_401_STABLE'
Your branch is up to date with 'origin/MOODLE_401_STABLE'.
$ git branch
* MOODLE_401_STABLE
  main
Continue with setting up Moodle at the www root:
$ sudo cp -R /home/o/moodle /var/www/html/
$ sudo chmod -R 0755 /var/www/html/moodle
$ sudo mkdir /var/www/moodledata
$ sudo chown -R www-data /var/www/moodledata
$ sudo chmod -R 0777 /var/www/moodledata
There are references that use /usr/local/moodledata as an alternative to /var/www/moodledata to store user uploads, session data, and other things that only Moodle can access and are not accessible from the web. The alternative for the cache store is in /var/cache/moodle.
Additionally, if you encounter HTTP 403 Forbidden while accessing http://192.168.122.123/moodle/ and the error log at /var/log/nginx/error.log indicates that it’s because directory index of “/var/www/html/moodle/” is forbidden, you need to change your access to http://192.168.122.123/moodle/index.php or adjust the index configuration in /etc/nginx/sites-enabled/default by adding index.php:
    # Add index.php to the list if you are using PHP
    index index.php index.html index.htm index.nginx-debian.html;
Or, if everything is okay, you should see the Moodle installation page when accessing http://192.168.122.123/moodle/.
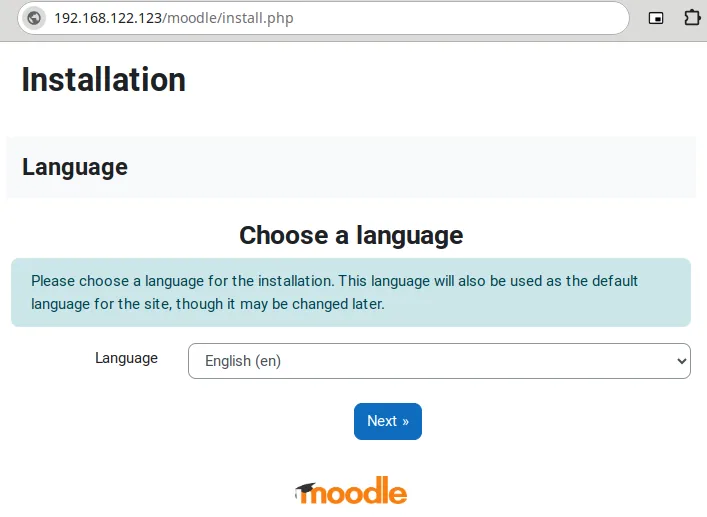
From the installation page, after clicking Next, you will see a form with 3 inputs:
Web address: http://192.168.122.123/moodle
Moodle directory: /var/www/html/moodle
Data directory: /var/www/moodledata
(you can adjust the data directory to whatever you want, as created above, e.g., /var/moodledata)
After clicking Next again, you choose the database driver:
Type: PostgreSQL (native/pgsql)
Next, the database settings:
Database host: localhost
Database name: moodle
Database user: moodle
Database password: insecure~pasSw0rd
Tables prefix: mdl_
Database port: 5432
Unix socket:
(you can get the database port and unix socket from \conninfo above; you can try to exclude the Unix socket if you still cannot connect).
The connection should fail because you don’t have the PostgreSQL user moodle and the database moodle. Then it’s time to set up the database for Moodle.
$ sudo su - postgres -c psql
Using the PostgreSQL console:
postgres=# CREATE USER moodle WITH PASSWORD 'insecure~pasSw0rd';
CREATE ROLE
postgres=# CREATE DATABASE moodle;
CREATE DATABASE
postgres=# GRANT ALL PRIVILEGES ON DATABASE moodle to moodle;
GRANT
postgres=# \q
And after another Next, the result of the configuration:
<?php  // Moodle configuration file

unset($CFG);
global $CFG;
$CFG = new stdClass();

$CFG->dbtype    = 'pgsql';
$CFG->dblibrary = 'native';
$CFG->dbhost    = 'localhost';
$CFG->dbname    = 'moodle';
$CFG->dbuser    = 'moodle';
$CFG->dbpass    = 'insecure~pasSw0rd';
$CFG->prefix    = 'mdl_';
$CFG->dboptions = array (
  'dbpersist' => 0,
  'dbport' => 5432,
  'dbsocket' => '',
);

$CFG->wwwroot   = 'http://192.168.122.123/moodle';
$CFG->dataroot  = '/var/www/moodledata';
$CFG->admin     = 'admin';

$CFG->directorypermissions = 0777;

require_once(__DIR__ . '/lib/setup.php');

// There is no php closing tag in this file,
// it is intentional because it prevents trailing whitespace problems!
Create the config.php at /var/www/html/moodle/config.php, set the user and group (owner) of the file to be the same as PHP-FPM above, and also set the permission so others can not do anything:
$ sudo vim /var/www/html/moodle/config.php
$ sudo chown www-data:www-data /var/www/html/moodle/config.php
$ sudo chmod o-rwx /var/www/html/moodle/config.php
$ ls -al /var/www/html/moodle/config.php
-rw-r----- 1 www-data www-data 699 Mar 23 04:55 /var/www/html/moodle/config.php
Afterward, confirm the conditions (copyright, license, etc), and then we’ll be redirected to the Moodle admin page to check the minimum configuration settings:
http://192.168.122.123/moodle/admin
If all the minimum configuration passes, the Moodle installation processing starts, showing Moodle’s installed modules. At the end of the installation, the page editadvanced.php will configure the main administrator (admin) account for the password and email address.
Next, we’ll be redirected to the Dashboard: http://192.168.122.123/moodle/my.
If you see many unloaded files (images, JS, CSS, etc.) in the browser, check the default access.log for HTTP 404.
$ sudo tail -f /var/log/nginx/access.log | grep 404
One of the tricks is to change the slasharguments in the configuration; add $CFG->slasharguments = false; before require_once(__DIR__ . '/lib/setup.php'); in /var/www/html/moodle/config.php 910. We’ll do this temporarily, as the SCORM packages require the slasharguments, until we reconfigure Nginx to support the slasharguments.
Reconfigure Nginx to support slasharguments, change from:
        location ~ \.php$ {
                include snippets/fastcgi-php.conf;

                # With php-fpm (or other unix sockets):
                fastcgi_pass unix:/run/php/php8.1-fpm.sock;
        }
To the configuration below (and don’t forget to sudo systemctl restart nginx):
        location ~ [^/]\.php(/|$) {
                fastcgi_split_path_info  ^(.+\.php)(/.+)$;
                fastcgi_index            index.php;
                fastcgi_pass             unix:/run/php/php8.1-fpm.sock;
                include                  fastcgi_params;
                fastcgi_param   PATH_INFO       $fastcgi_path_info;
                fastcgi_param   SCRIPT_FILENAME $document_root$fastcgi_script_name;
        }
DONE (for now)! A “simple” Moodle installation.
Yes, it’s quite fun to explore Moodle (and PHP) again.. 🙊
PS.
Note regarding KVM, the DHCP service for the guest operating system needs the package dnsmasq installed on the host.
Note regarding debconf, if you encounter a warning regarding debconf: unable to initialize frontend: Dialog, you can switch the setting to debconf/frontend: Noninteractive 11.
$ sudo debconf-show debconf
  debconf/priority: high
  debconf-apt-progress/info:
  debconf-apt-progress/preparing:
  debconf-apt-progress/media-change:
  debconf/frontend: Dialog
  debconf-apt-progress/title:
$ echo 'debconf debconf/frontend select Noninteractive' | sudo debconf-set-selections
$ sudo debconf-show debconf
  debconf/priority: high
* debconf/frontend: Noninteractive
  debconf-apt-progress/title:
  debconf-apt-progress/info:
  debconf-apt-progress/media-change:
  debconf-apt-progress/preparing:
Note regarding https, we’ll cover it in another article to set up HTTPS on the website which uses nginx and certbot from the Let’s Encrypt Certificate Authority (CA).
Note regarding supportemail, install postfix on the server sudo apt install postfix and set the required support email to, for example,
[email protected].
☁️
-
https://docs.moodle.org/403/en/Installing_Moodle_on_Debian_based_distributions ↩︎
-
https://docs.moodle.org/403/en/Step-by-step_Installation_Guide_for_Ubuntu ↩︎
-
https://docs.moodle.org/403/en/Installation_on_Ubuntu_using_Git ↩︎
-
https://moodledev.io/general/releases/4.1#server-requirements ↩︎ ↩︎ ↩︎ ↩︎
-
https://moodledev.io/general/development/policies/php#php-81 ↩︎